 Dave the Diver中文
DAVE THE DIVER Beginner Guide
A complete visual route from your first dive to a stable daily loop: time, live capture, weapons, oxygen, resources, sushi service, upgrades, and safe boss responses.
- Learn the time cycle and safe return habits before chasing deeper water and bigger payouts.
- High-star live catches, stable supply, and smart cargo choices create the early-game growth loop.
- When a fight is unsafe, ascend with your haul instead of forcing the encounter.
Opening and time management
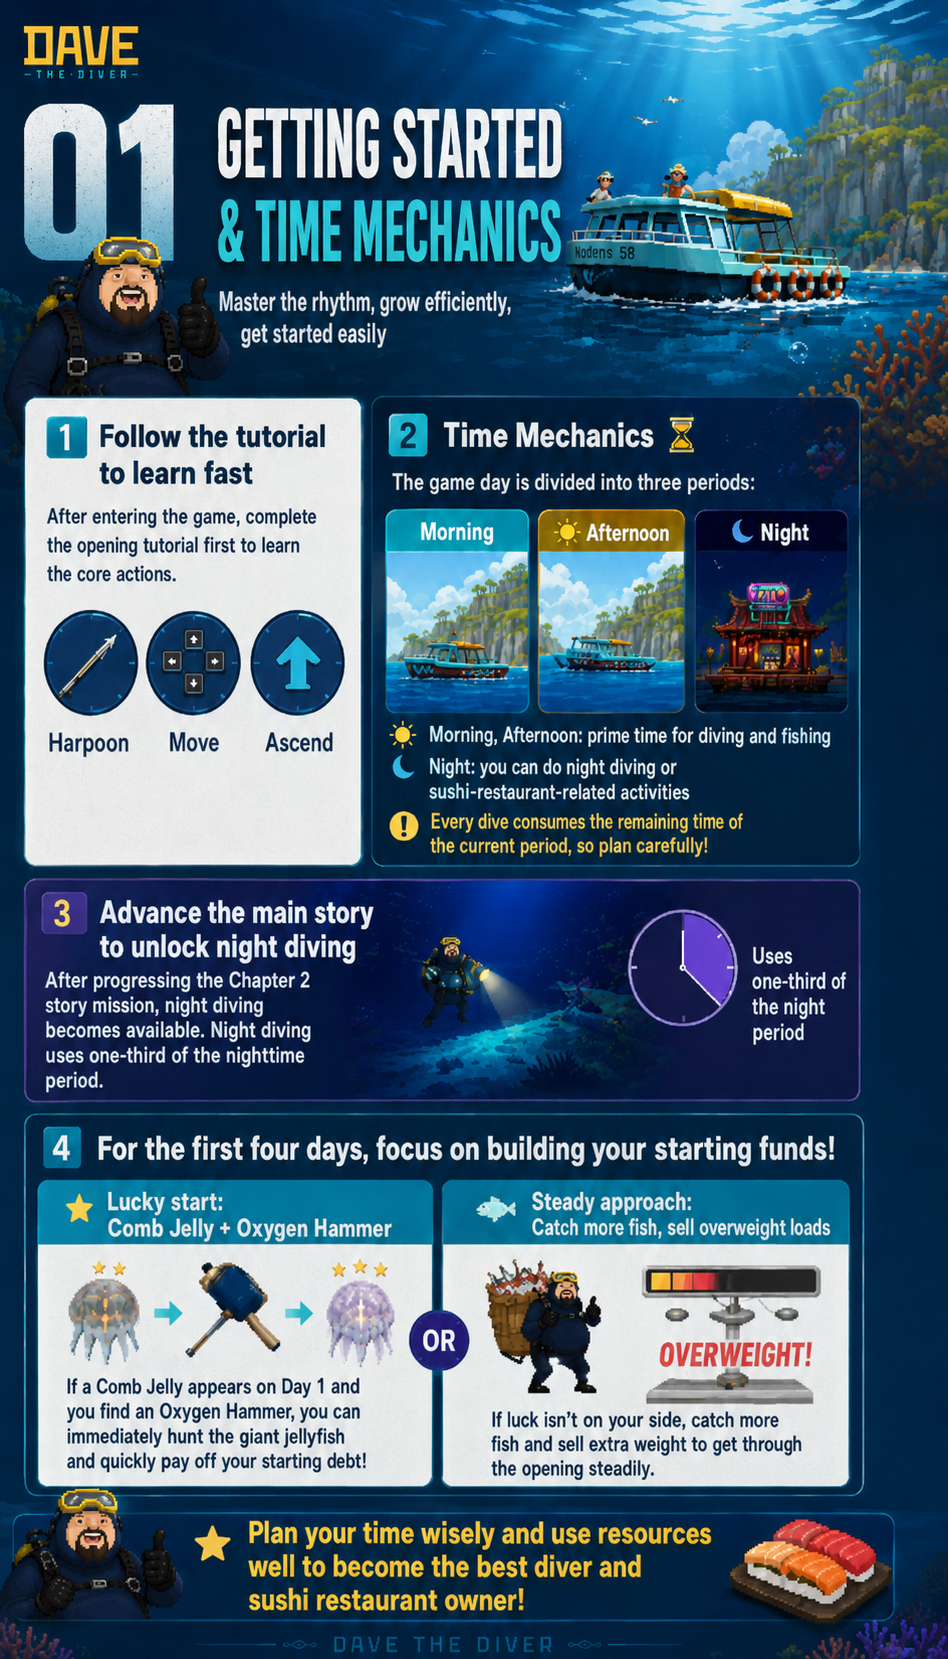
Start with the tutorial to learn the harpoon, movement, and fast ascend. Each game day has morning, afternoon, and night: the first two are prime diving windows, while night is for story progress, night diving, or restaurant service. Night diving unlocks after Chapter 2 progress and uses one-third of the night period.
- For the first four days, build starting funds before spending on restaurant decor.
- A Comb Jelly and Oxygen Hammer on Day 1 can quickly pay off the opening debt; otherwise, catch more fish and sell overweight loads for a steady start.
- Every dive consumes time in the current period. Choose one clear purpose before you descend.
Capture stars and live catch
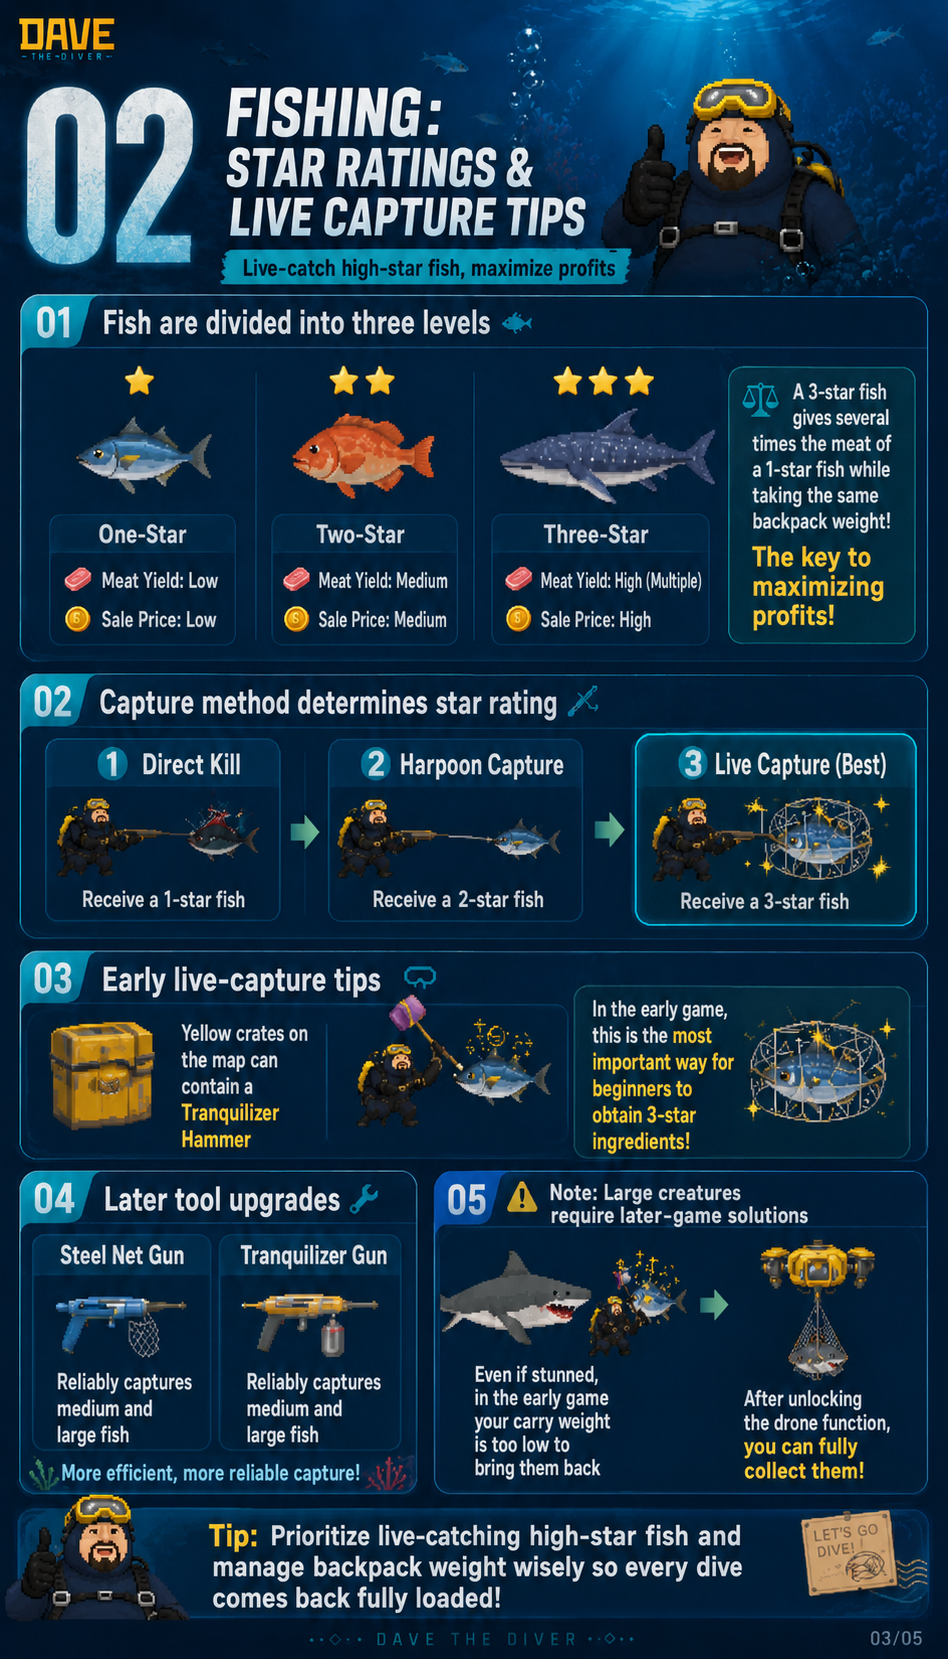
Fish come in one-star, two-star, and three-star quality. Higher stars mean more meat and a higher sale price, while taking the same backpack weight. Learn the capture method early so every dive brings back more value.
- Direct kills usually yield one-star fish, while harpoon captures yield two-star fish.
- Live capture with tools such as the Steel Net Gun or Tranquilizer Gun produces three-star fish and is the key to maximizing profit.
- Yellow crates can contain a Tranquilizer Hammer. Use it on early small fish to start collecting three-star ingredients sooner.
- Large creatures may be too heavy to carry early on. Unlock the drone before trying to recover the full catch.
Early weapon choices
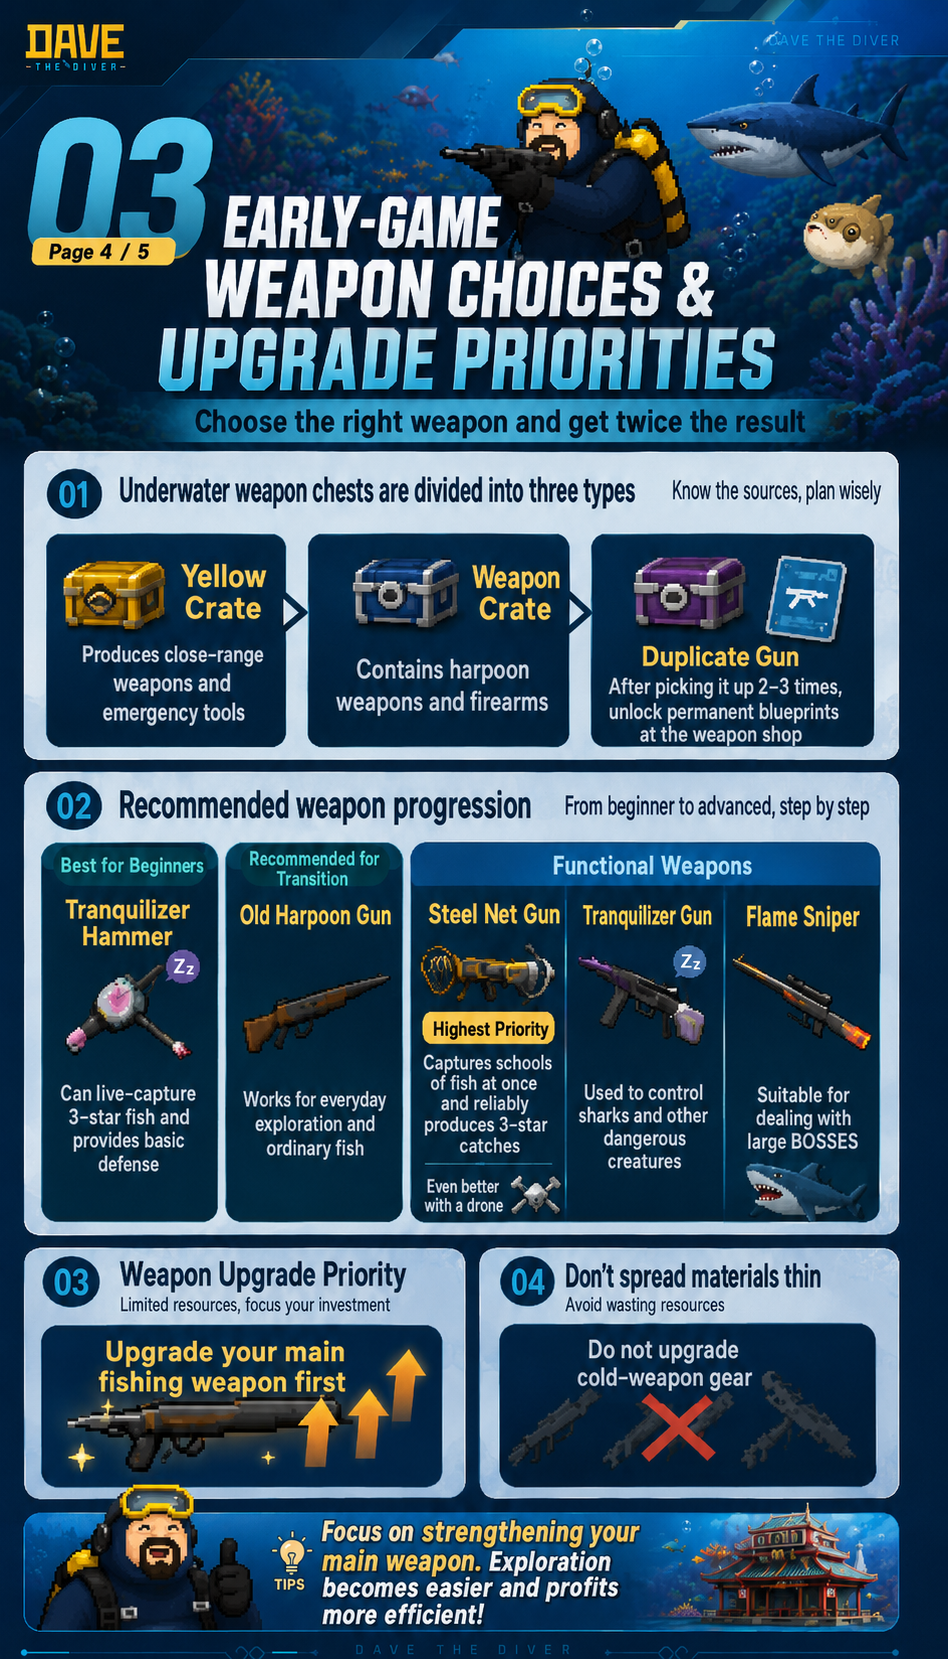
Underwater weapon chests come in yellow, blue, and purple. Yellow crates carry close-range weapons or emergency tools, blue weapon crates hold harpoon weapons and firearms, and duplicate gun pickups eventually unlock permanent blueprints at the weapon shop. Pick one main weapon instead of spreading materials across several side options.
- The Tranquilizer Hammer is a strong beginner choice because it supports three-star live catches and basic defense.
- The Old Harpoon Gun is a reliable transition weapon for everyday exploration and ordinary fish.
- Prioritize the Steel Net Gun for schools of fish and steady three-star captures. Its value grows further once the drone is available.
- Use the Tranquilizer Gun for sharks and other dangerous creatures, and the Flame Sniper for large bosses.
Oxygen and safe depth
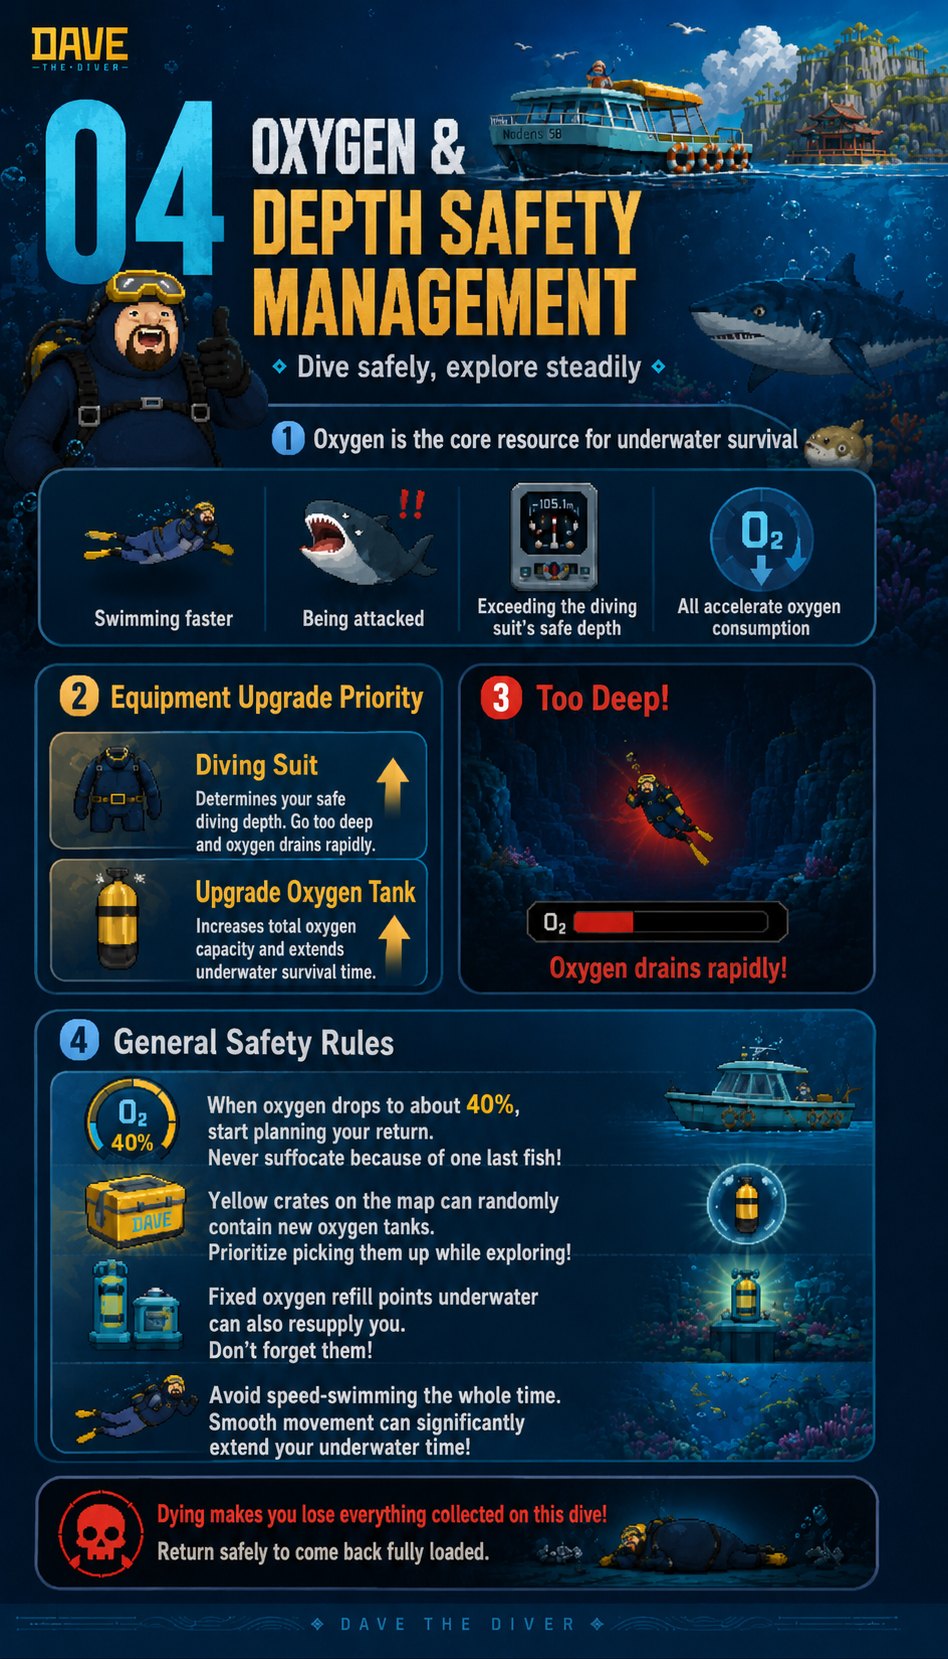
Oxygen is the core resource for surviving underwater. Speed swimming, taking damage, and exceeding your diving suit's safe depth all accelerate oxygen loss. If it runs out, you lose the entire haul from that dive, so preserve enough for the return trip.
- Upgrade the Diving Suit and Oxygen Tank first. The suit controls safe depth, and the tank extends your underwater time.
- At roughly 40% oxygen, start planning your return instead of gambling for one more fish.
- Open yellow crates for possible oxygen tanks and remember fixed underwater refill points.
- Avoid speed swimming for the whole dive. Smooth movement noticeably extends your time underwater.
Collection priority and cargo planning
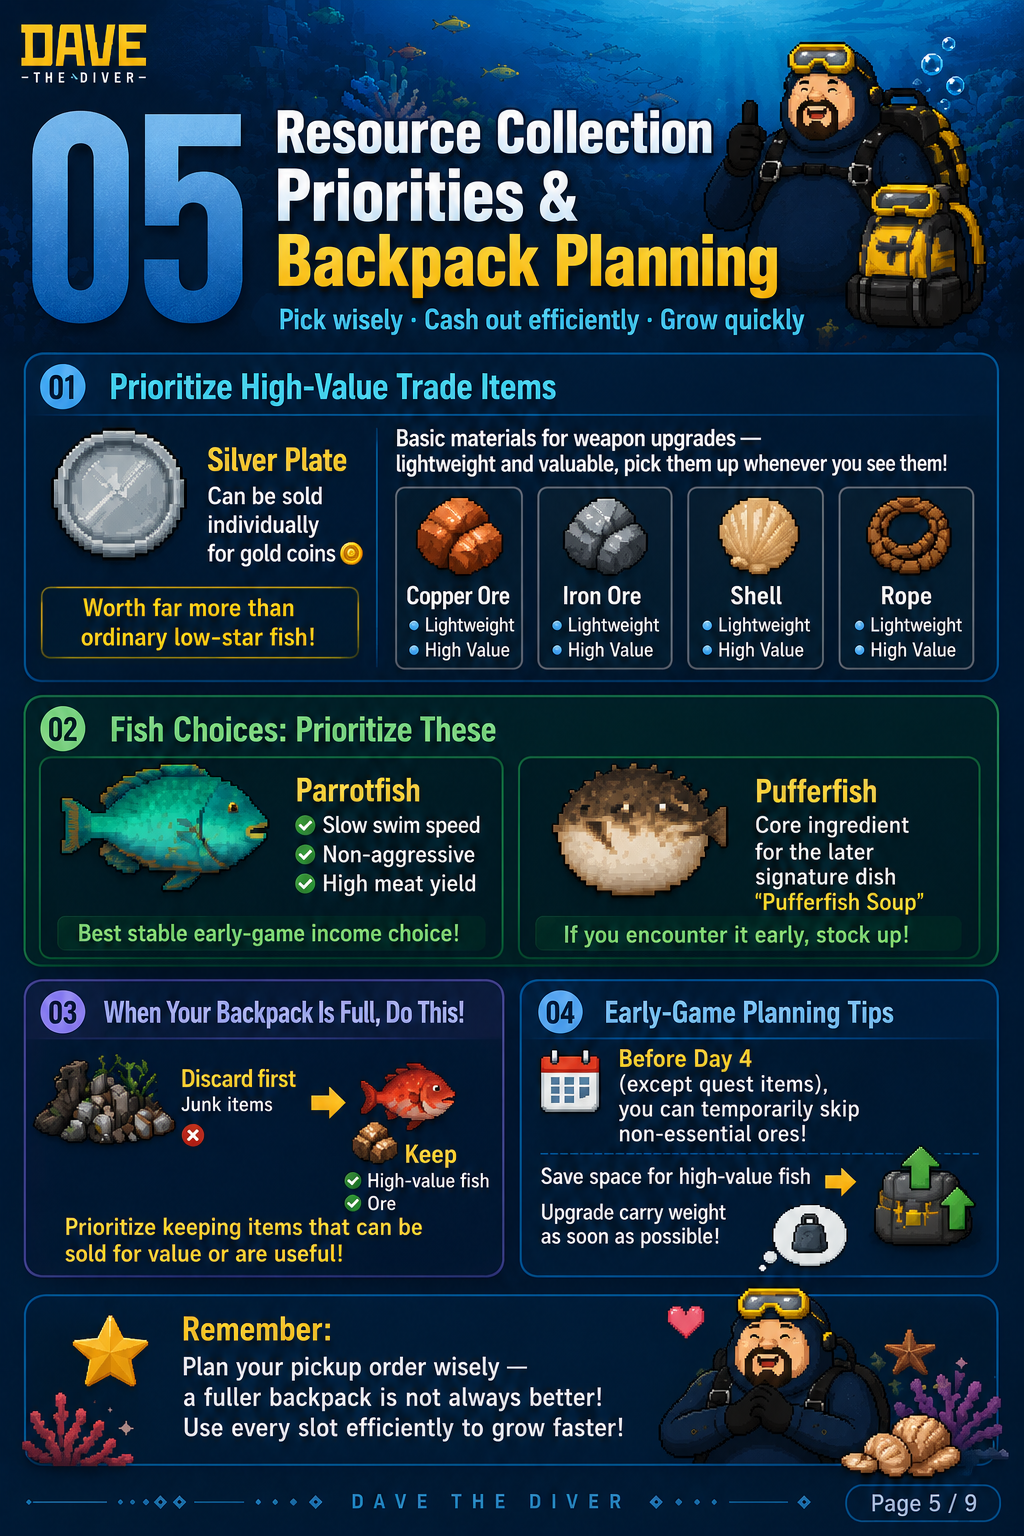
A full backpack is not automatically a good backpack. Bring back resources that can be sold, upgraded, or used in later dishes. Early on, prioritize easy, reliable fish and reserve room for high-value materials and key ingredients.
- Pick up Silver Plates, Copper Ore, Iron Ore, Shells, and Rope whenever you see them. They are lightweight, valuable, and used for weapon upgrades.
- Parrotfish are a stable early-game choice because they are slow, non-aggressive, and give a high meat yield.
- Stock Pufferfish when you encounter them. They are a core ingredient for the later Pufferfish Soup signature dish.
- When full, discard junk first. Keep ore, high-value fish, and useful items; before Day 4, non-essential ore can wait unless a quest needs it.
Sushi bar profit route
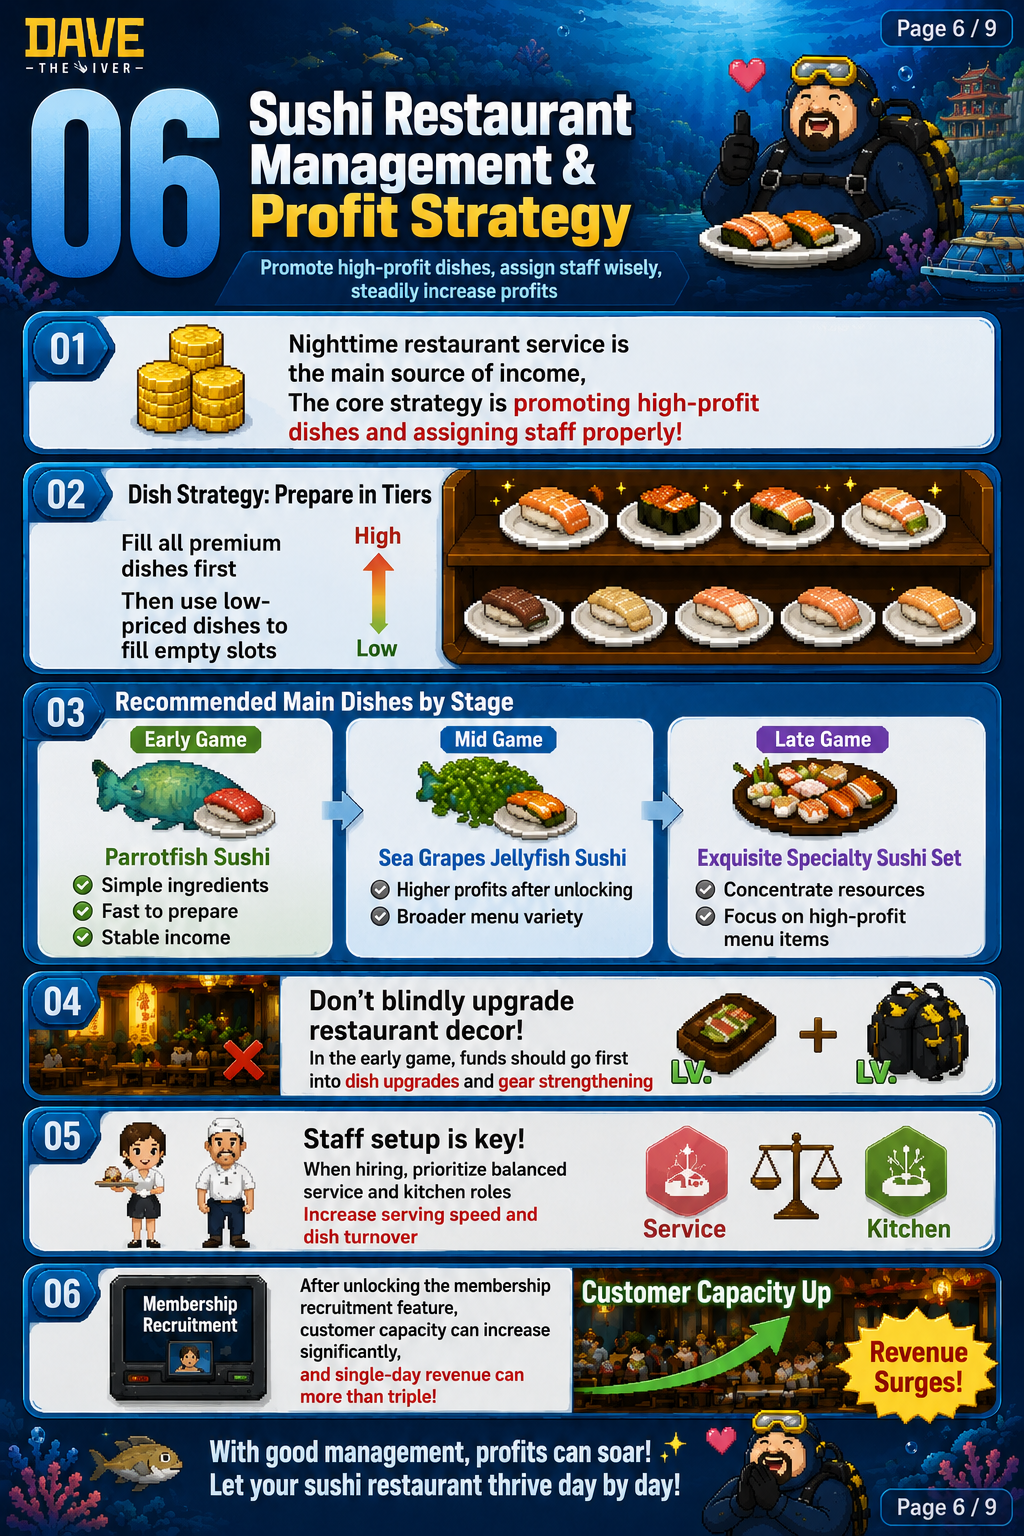
Nighttime sushi service is the main source of income. Do not try to fill every menu slot immediately. Start with dishes that have stable supply, prepare in tiers, and concentrate upgrades on a small set of reliable earners. Early funds belong in dishes and gear, not restaurant decor.
- Fill premium dishes first, then use lower-priced dishes to cover empty menu slots.
- Start with Parrotfish Sushi for simple ingredients and stable income. Move to Sea Grapes Jellyfish Sushi in mid game, then concentrate resources on the Exquisite Specialty Sushi Set later on.
- Hire staff with balanced service and kitchen roles to improve serving speed and turnover.
- After unlocking membership recruitment, customer capacity and daily revenue can rise significantly.
Upgrade order and growth route
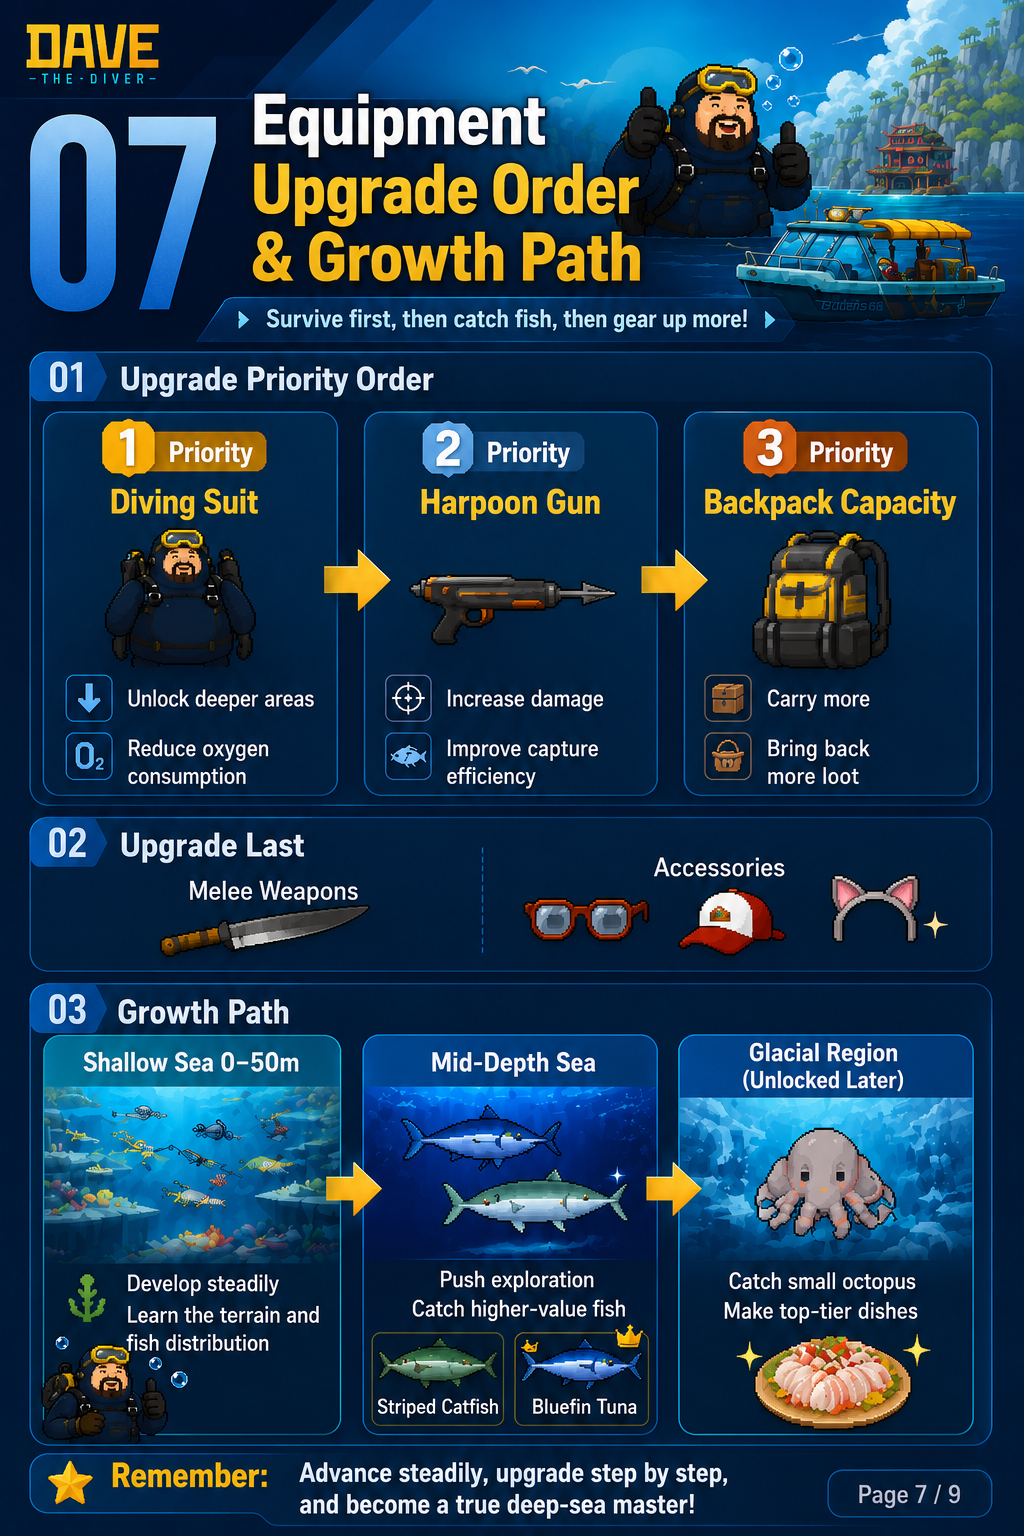
Upgrade order decides whether you can safely enter the next depth band. Build survival first, then capture efficiency, then carrying capacity. Leave melee weapons and cosmetic accessories until later, and keep limited materials focused on your main tools.
- First upgrade the Diving Suit to unlock deeper areas and reduce oxygen pressure, then the Harpoon Gun for damage and capture efficiency, then Backpack Capacity.
- Save melee weapons and accessories such as glasses, caps, and cat ears for later.
- Progress from the Shallow Sea at 0-50m to mid-depth waters, then the Glacial Region. Learn the terrain first, chase higher-value fish in mid water, and use late-game ingredients such as small octopus for top dishes.
- Steady upgrades create more reliable income than forcing a deep dive before you are ready.
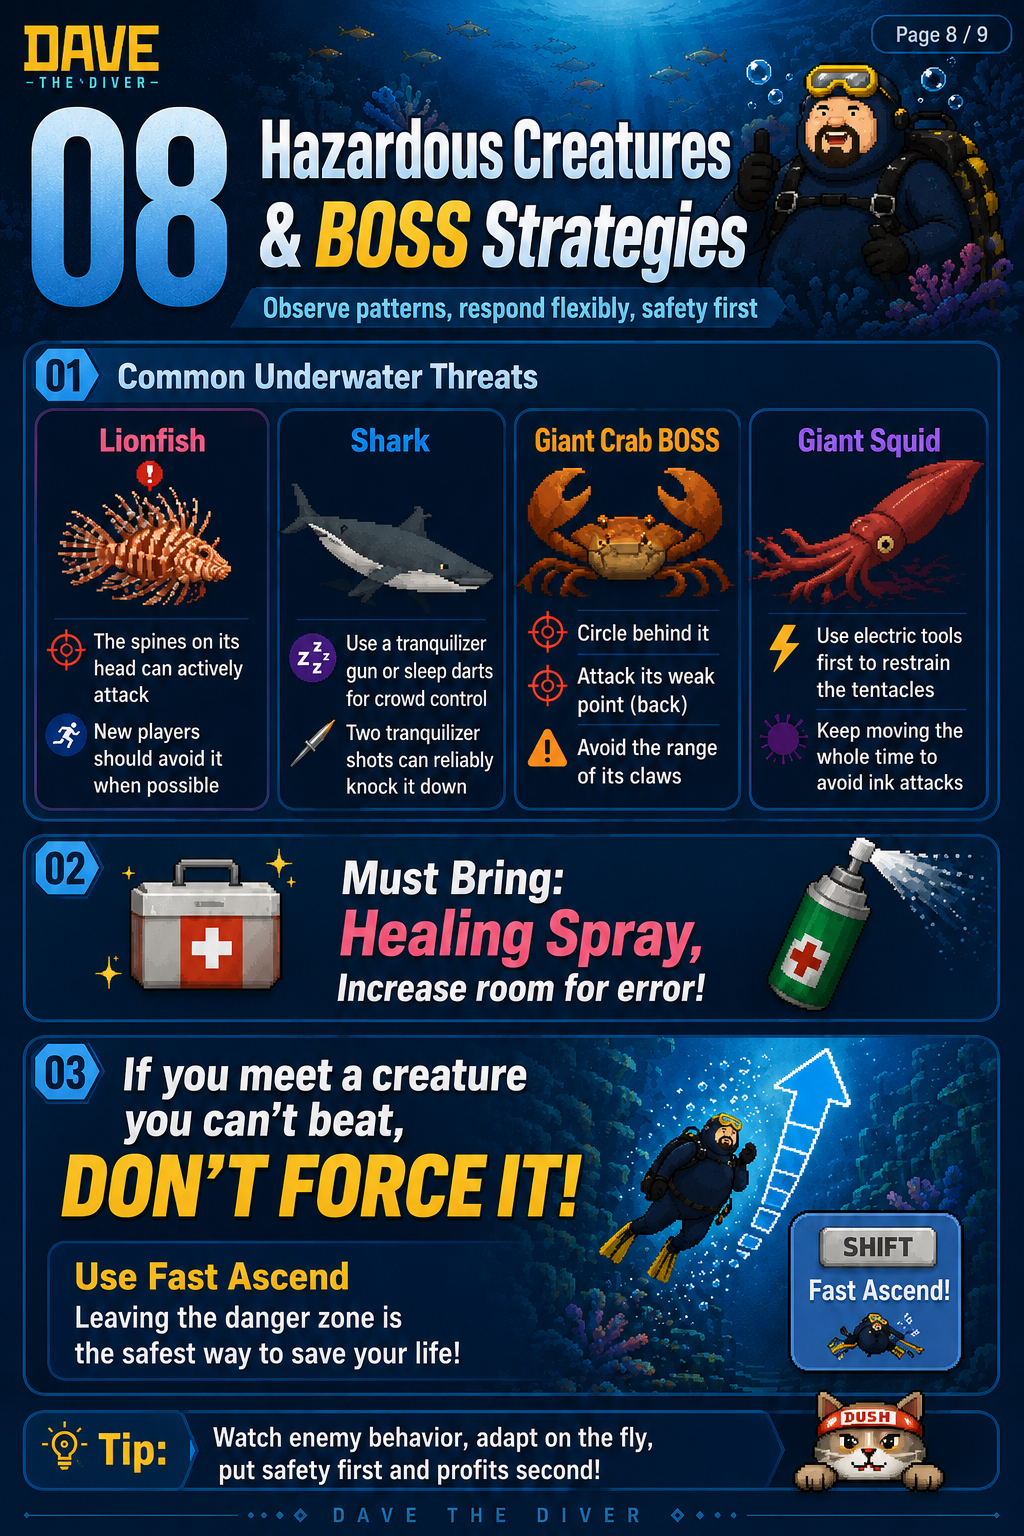
Dangerous creatures and boss response
Watch enemy behavior before committing. Lionfish can actively attack, sharks can be controlled with tranquilizers or sleep darts, the Giant Crab exposes a weak point on its back, and the Giant Squid needs electric tools and constant movement. If the encounter is unsafe, fast ascend with your haul.
- Bring Healing Spray for extra room for error and keep enough oxygen for a safe ascent route.
- Avoid Lionfish when possible as a new player. Control sharks first, then attack.
- Circle behind the Giant Crab and hit its weak point while staying out of claw range. For the Giant Squid, restrain tentacles with electric tools and keep moving to avoid ink attacks.
- Do not force a fight you cannot win. Press Shift to fast ascend. Safety comes before profit.
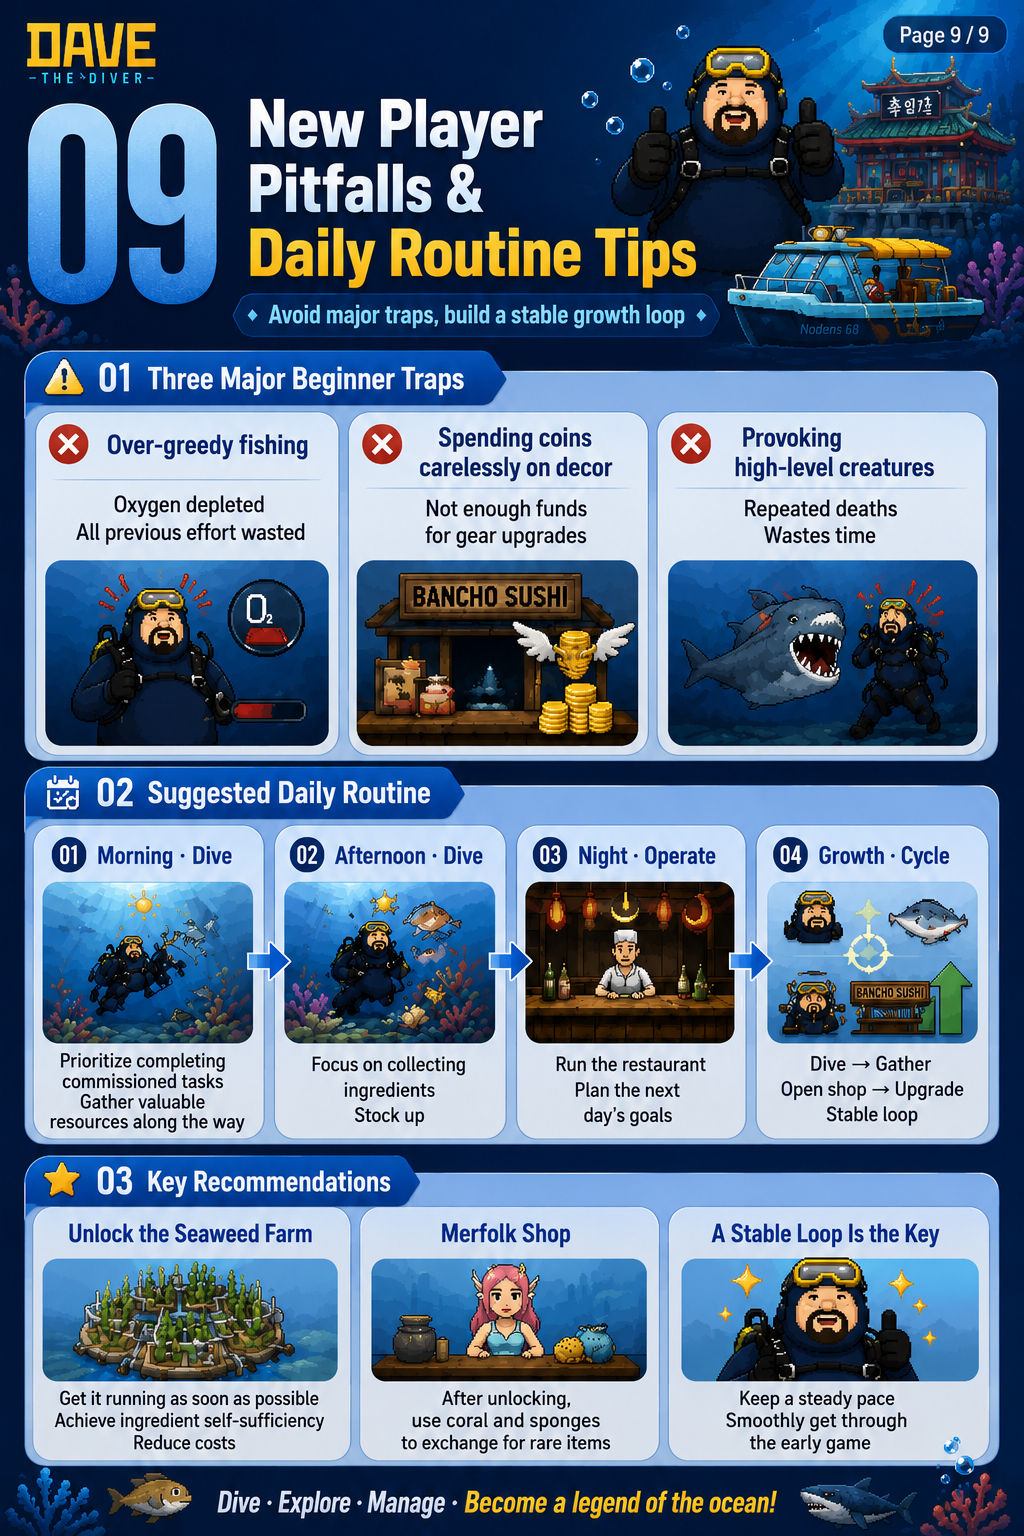
Daily loop and common traps
A stable day follows a simple rhythm: dive in the morning to progress commissions and collect valuable resources, dive again in the afternoon to stock ingredients, then run the sushi restaurant at night and plan the next day. Connect diving, gathering, service, and upgrades into one loop.
- Do not over-greed for deep fish until oxygen is empty, and do not spend early coins carelessly on decor instead of gear and dishes.
- Do not repeatedly provoke high-level creatures. Improve equipment, tools, and oxygen capacity first.
- Start the Seaweed Farm early for ingredient self-sufficiency and lower costs. After unlocking the Merfolk Shop, exchange coral and sponges for rare items.
- Keep a steady pace through the early game. Diving and restaurant management will then support each other and accelerate growth.